How to Recover Deleted Notes from iPad with/without Backup
Did you mistakenly delete your notes on your iPad and you seriously need them back? Do you have your notes backup on iCloud or iTunes and don't know how to get them back or need an easy way to restore them? Worry no more. In this tutorial, I will clearly explain how you can recover your deleted notes or data back on your iPad and other iDevices using a powerful third party software. You can also use it to backup your iPhone notes to your PC or Mac.
Recover your deleted or lost iPad notes using iOS recovery. iOS recovery is a data recovery software that allows you to directly restore deleted iPhone notes, multimedia, SMS, contacts, call history, calendar, on any iDevice. With iOS data recovery, you can achieve the following:
- • Restore deleted notes from iTunes backup
- • Recover deleted notes from iCloud backup
- • Recover deleted notes on your iPad without backup
iOS recovery provides you with three different simple mode of recovery.
MODE 1: RECOVER NOTES DIRECTLY FROM YOUR iPAD
Did you delete your iPad notes accidentally or carelessly without having a backup? Don't be afraid; follow these steps to get them back.
Step 1: Download, Install and Run iOS recovery
Download iOS recovery and install it on your PC. After the successful installation, double click the application icon to open/run it.
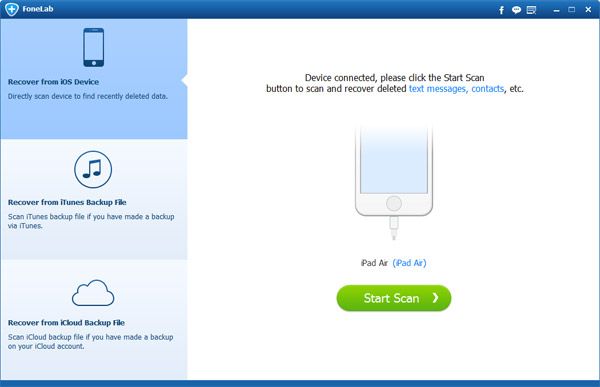
Step 2: Scan your iPad
Connect your iPad to your PC and wait for some seconds for your device to be detected. After your device is detected, click "Recover from iOS device". Then, click"Start Scan" and the scanning process will start. You don't have to get a bottle of beer as the process is fast – although, this depends more on your PC than the software.
Note: If your device is iPhone 4/3GS, iPad 1 or iPod touch 4, you will need to download a plug-in before entering the scanning mode.

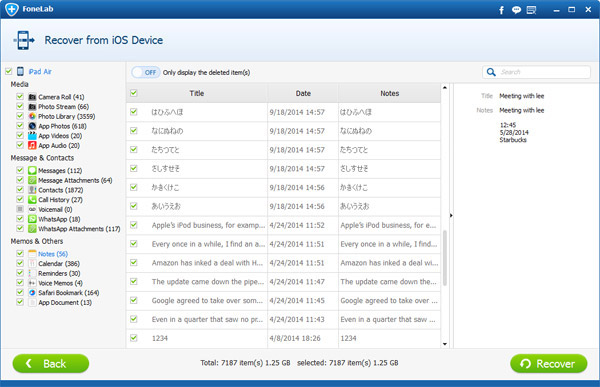
Step 3: Preview your Notes and Restore
After the scanning process is complete, click on "Notes" under "Memos and Others" category. Preview the result and click on "Recover" button to restore your notes.
MODE 2: RECOVER FROM iTUNES BACKUP
If you have an iTunes backup of your iPad data, follow these procedures to recover your lost notes back to your device.
Step 1: Download, Install and Run iOS recovery
Follow the first step in Mode 1 to download, install and run FonLab on your PC.
Step 2: Scan iTunes Backup
Click on "Recover from iTunes Backup File" from the left pan.
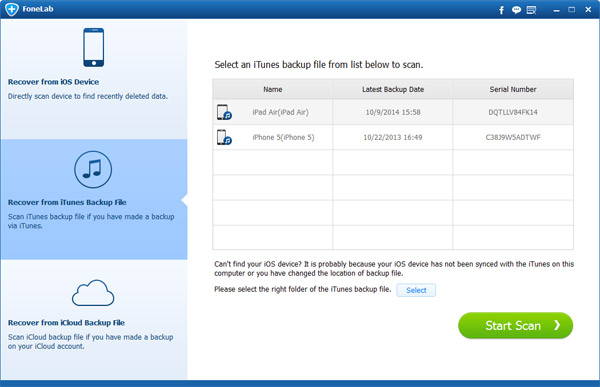
Step 3: Select the iTunes Backup file and Scan
Select the iTunes backup file you want to restore from the lists of backups displayed. Click "Start Scan" button to start scanning the backup file.
If you encounter any error here or you did not see your backup file, make sure that your device has been synced with the iTunes application on the PC.
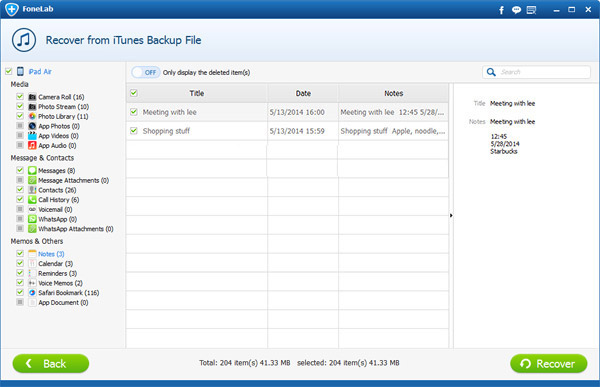
Step 4: Preview your Notes and Restore
When the scanning process is complete, all files from the backup will be categorized. Click on "Notes" under "Memos and Others" category. Preview the result and restore your notes by clicking on the "Recover" button.
MODE 3: RECOVER FROM iCLOUD BACKUP
Step 1: Select Recover from iCloud Backup File
Make sure that iOS recovery is accurately installed on your PC. From the main program interface, select "Recover from iCloud Backup File".
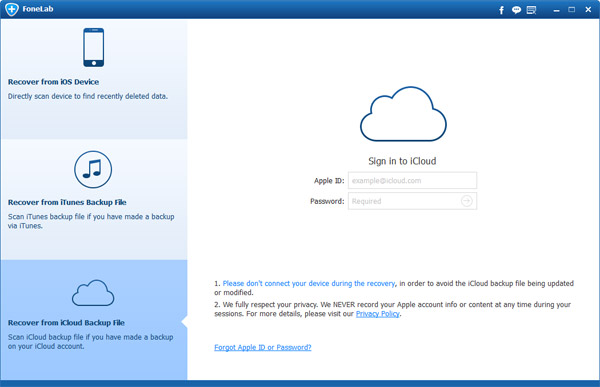
Step 2: Login to your iCloud Account
Supply your login details to access your iCloud account and wait for the communication to be established between the application and your iCloud account.
Note: Do not connect your device to PC during this process in order to prevent the iCloud backup file from being updated or modified.
Step 3: Scan the Backup File
Select the backup file you want to restore from and click "Start Scan" button to start scanning the backup file.
Step 4: Preview your Notes and Restore
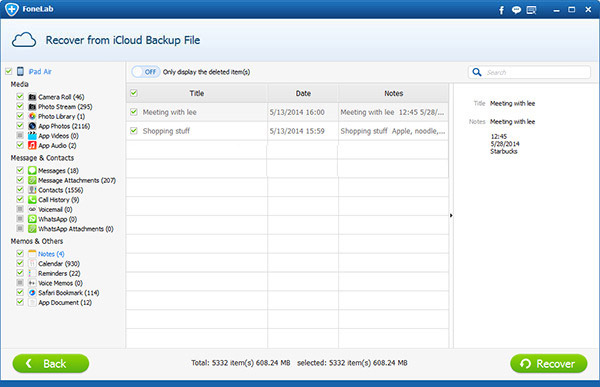
When the scanning process is complete, all files from the backup will be categorized.
Click on "Notes" under "Memos and Others" category. Preview the result and restore your notes to your device by clicking on the "Restore" button.